
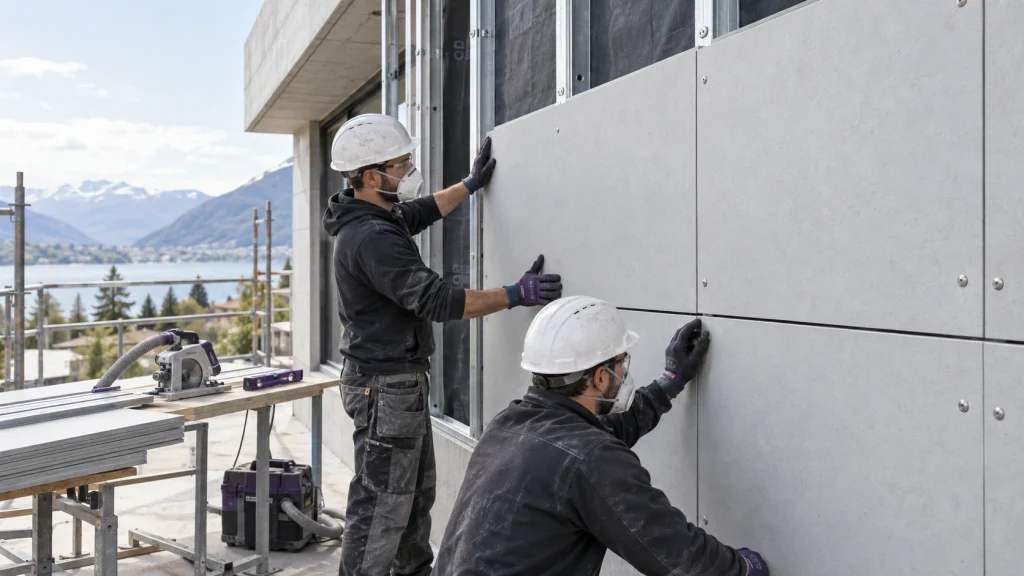
Installing fiber cement board is not simply a matter of fixing a cement sheet to a wall.
The board type, supporting structure, fasteners, joint design and moisture-management layers must work together. A strong board can still crack, stain or become unstable when it is installed over uneven framing, fixed too tightly or used in the wrong application.
Installation requirements also vary significantly between:
- Standard fiber cement construction boards
- Architectural fiber cement facade panels
- Fiber cement siding planks
- Interior lining boards
- Soffit and ceiling boards
- Tile-backer and wet-area boards
This guide explains the main principles contractors, distributors and project buyers should understand before installing or specifying fiber cement products.
Important: This is a general installation guide. Final framing distances, fastener spacing, edge distances, joint widths and weatherproofing details must follow the technical documentation for the exact product, the project engineer’s design and local building regulations.
Quick Answer
A reliable fiber cement board installation normally requires:
- Selecting a board approved for the intended application
- Storing the sheets flat, dry and properly supported
- Inspecting the framing or substructure before installation
- Using manufacturer-approved, corrosion-resistant fasteners
- Keeping the required distance from board edges and corners
- Allowing for moisture and temperature movement
- Providing suitable joint, flashing and edge details
- Using a weather barrier or waterproofing layer where required
- Controlling dust during cutting and drilling
- Following a product-specific fixing layout rather than a universal spacing rule
The most common installation problems are not caused by the basic fiber cement material. They are usually caused by incorrect product selection, unsuitable fasteners, poor framing, restricted panel movement or incomplete moisture detailing.
1. Identify the Fiber Cement Product Before Installation
The term “fiber cement board” covers several products that may look similar but perform very different functions.
Before deciding how to install a board, identify its intended use.
| Product type | Typical applications | Common fixing approach |
|---|---|---|
| Standard fiber cement board | Interior walls, ceilings, soffits, exterior substrates and modular construction | Screws or approved nails into timber or metal framing |
| Fiber cement facade panel | Ventilated facades and architectural rainscreen systems | Rivets, facade screws, clips or an approved concealed fixing system |
| Fiber cement siding | Residential and low-rise exterior walls | Nails, screws or clips, depending on the siding profile |
| Tile-backer board | Bathrooms, kitchens and tiled wet areas | Approved screws over a suitable frame or substrate |
| Purpose-designed flooring board | Subfloors or flooring substrates | Application-specific screws, adhesive or bedding systems |
A standard construction board should not automatically be installed as an exposed architectural facade panel. Likewise, a thicker wall board should not be treated as a structural flooring board unless that use is supported by testing and technical documentation.
If the product type is unclear, review our guide to fiber cement board types before planning the installation.
2. Check the Board Specification
Confirm the following information before materials arrive on site:
- Product type and intended application
- Board thickness
- Board dimensions
- Density and approximate weight per square metre
- Edge profile
- Surface finish
- Installation orientation
- Framing or subframe type
- Maximum permitted support spacing
- Fastener material, diameter, head type and length
- Required edge and corner distances
- Joint treatment
- Exterior exposure classification
- Cut-edge treatment
- Fire or acoustic system requirements
- Applicable test reports and local approvals
Thickness alone is not enough to determine installation requirements.
Two 8 mm fiber cement boards, for example, may have different densities, bending strengths, surface treatments and intended uses. One may be designed as an architectural facade panel, while another is intended only as a general-purpose construction board.
For more information, see our fiber cement board thickness guide.
3. Storage and Handling Before Installation
Fiber cement products must be protected before they are installed.
Store boards flat
Sheets should normally be stored horizontally on a flat, stable and fully supported pallet.
Incorrect support can introduce bending, edge damage or distortion before the boards reach the wall. Avoid resting large sheets against a wall unless the manufacturer specifically permits vertical storage.
Keep the material dry
Protect boards from rain, standing water and condensation during transportation and storage.
A waterproof cover should prevent direct exposure while still allowing ventilation around the pallet. Completely sealing wet boards inside plastic can trap moisture.
Carry boards correctly
Large fiber cement sheets are relatively heavy and may also be brittle before they are fixed to the supporting structure.
Depending on the panel size and product instructions:
- Use two people to carry large sheets
- Carry the boards on edge where recommended
- Do not drag one finished panel across another
- Use lifting equipment for large-format facade panels
- Protect corners and decorative surfaces
- Keep pre-finished panels clean during handling
Inspect before installation
Check for:
- Broken corners
- Edge cracks
- Surface scratches
- Excessive bowing
- Incorrect dimensions
- Color or finish differences
- Water contamination
- Batch identification
For pre-finished and through-colored facade panels, plan the installation sequence before removing the panels from their pallets.
4. Cutting Fiber Cement Board Safely
Cutting is one of the most important parts of fiber cement board installation.
The appropriate cutting method depends on board thickness, density, finish and manufacturer instructions.
Possible methods include:
- Score-and-snap tools for certain thinner boards
- Manual or powered fiber cement shears
- A circular saw with an approved fiber cement blade
- A track saw with suitable dust extraction
- Carbide-tipped tools
- Hole saws or drills suitable for cement-based materials
- Factory cutting and CNC machining for architectural panels
Not every method is suitable for every board.
Control cutting dust
Cutting, grinding and drilling cement-based products may release fine mineral dust, including respirable crystalline silica where silica-containing materials are present.
Before cutting:
- Read the product Safety Data Sheet
- Follow local occupational health regulations
- Use an approved low-dust cutting method
- Connect the tool to suitable dust extraction
- Work outdoors or in a well-ventilated cutting area where possible
- Wear the required eye, hearing and respiratory protection
- Prevent dust from spreading into occupied areas
- Do not use uncontrolled dry sweeping to clean fine dust
A general-purpose wood blade should not be assumed suitable for fiber cement. The wrong blade can create excessive dust, rough edges, chipping and premature tool wear.
Support the board during cutting
Place the board on a stable cutting table with adequate support on both sides of the cut.
Large unsupported offcuts may break away before the cut is complete and damage the finished edge.
Treat cut edges correctly
Some products require cut edges to be sealed, coated or painted before installation. Other products have different requirements.
Use only the edge treatment recommended for the exact board. Do not assume that a site-applied paint or generic sealer will be compatible with every pre-finished or through-colored panel.
5. Prepare the Framing or Substructure
A flat board cannot correct a poorly aligned frame.
Before fixing the first sheet, confirm that the supporting structure is:
- Straight
- Level
- Plumb
- Structurally adequate
- Properly anchored
- Dry and stable
- Free from incompatible projections
- Designed for the board dimensions and weight
- Suitable for the expected wind and service loads
Uneven framing can create stress within the board and produce visible steps at joints. For large-format facade panels, small subframe deviations can become very noticeable across the elevation.
Timber framing
Check:
- Timber dimensions and structural grade
- Moisture condition
- Stud alignment
- Treatment compatibility
- Required corrosion protection for fasteners
- Support behind board edges and joints
- Openings and additional framing around doors and windows
Movement caused by wet or unstable timber can affect joints and fasteners after installation.
Light-gauge steel framing
Confirm:
- Steel thickness
- Profile dimensions
- Stud spacing
- Screw pull-out capacity
- Corrosion protection
- Stud alignment
- Bracing and deflection
- Compatibility between screws and framing
A screw selected for timber framing may not be suitable for light-gauge steel.
Aluminium facade subframes
Architectural facade panels may be installed over T-profiles, L-profiles, brackets or proprietary rail systems.
The system must accommodate:
- Panel weight
- Wind pressure and suction
- Thermal movement
- Moisture movement
- Building movement
- Fixed and sliding connections
- Required ventilation
- Drainage
- Fire-stopping arrangements
- Local structural requirements
The panel layout and subframe layout should be coordinated before cutting begins.
6. Choose the Correct Fasteners
Fasteners should be selected as part of the complete board system.
Important factors include:
- Timber, steel or aluminium support
- Interior or exterior exposure
- Coastal or high-humidity conditions
- Board thickness and density
- Panel weight
- Wind load
- Visible or concealed fixing
- Required corrosion resistance
- Head diameter and profile
- Screw thread
- Embedment depth
- Compatibility with the surface finish
Possible fasteners include:
- Fiber cement board screws
- Corrosion-resistant self-drilling screws
- Approved nails
- Stainless steel facade screws
- Aluminium or stainless steel rivets
- Proprietary clips
- Concealed anchors
Ordinary drywall screws should not be treated as a universal substitute for fiber cement fasteners. They may have an unsuitable head, thread, corrosion resistance or load capacity.
Do not overdrive the fastener
Unless the specific system requires another detail, the fastener head should generally sit in the position defined by the manufacturer without crushing the board surface.
Overdriving can:
- Damage the board face
- Reduce holding capacity
- Introduce local cracking
- Break a pre-finished coating
- Restrict designed movement
- Create a path for moisture
Underdriven fasteners can interfere with joint finishing or create an uneven finished surface.
7. Fastener Spacing and Edge Distance
One of the most frequent questions is:
What is the correct screw spacing for fiber cement board?
There is no single spacing suitable for every fiber cement product.
The fixing layout depends on:
- Board dimensions
- Board thickness
- Board strength
- Support spacing
- Interior or exterior use
- Building height
- Wind load
- Fastener capacity
- Edge support
- Installation orientation
- Single-layer or multi-layer construction
- Wall, ceiling, soffit or facade application
The distance between a fastener and the board edge is also important. A fastener installed too close to an edge or corner may cause cracking. A fastener installed too far from the edge may not adequately restrain the board.
For some high-density facade panels, pre-drilled holes, fixed points and sliding points are required so the panel can accommodate movement. These details are fundamentally different from the direct screw fixing of a standard interior construction board.
Never copy a fixing schedule from another brand or application solely because the products have the same thickness.
8. Joint Gaps and Movement Control
Fiber cement is dimensionally stable, but it is not completely free from movement.
The board and supporting structure may respond to:
- Moisture changes
- Temperature changes
- Structural movement
- Framing shrinkage
- Wind pressure
- Building settlement
Joint design must allow the system to respond without cracking, buckling or opening unpredictably.
Open joints
Open joints are commonly used in ventilated facade systems.
In this arrangement:
- The joints remain visibly open
- Water may pass through the outer cladding layer
- A suitable weather-resistant layer protects the wall behind
- The cavity allows drainage and ventilation
- The subframe and membrane may need UV resistance
- Joint width forms part of the architectural design
An open-joint facade should not be treated as a sealed waterproof surface.
Sealed joints
Some standard exterior boards or panel systems use compatible sealant joints.
A sealed joint may require:
- Correct joint width and depth
- A suitable backing material
- Primer
- Compatible sealant
- Clean board edges
- Movement capacity
- Regular inspection
Filling a joint completely with a rigid material can cause cracking if movement was expected.
Taped and finished joints
Interior lining and tile-backer applications may require:
- Alkali-resistant mesh tape
- Approved joint compound
- Thin-set mortar
- Reinforced joint treatment
- Waterproofing over the completed substrate
The joint product must be compatible with both the board and the final finish.
Structural movement joints
Do not bridge a structural building movement joint with a continuous fiber cement board unless the engineered system specifically permits it.
The board joint layout should normally follow the required movement-joint strategy of the building.
9. Moisture Control Behind Fiber Cement Board
Fiber cement is often selected for moisture-exposed construction, but a moisture-resistant board does not by itself make a wall waterproof.
Exterior walls may still require:
- A water-resistive barrier
- A breathable weather membrane
- Flashing
- Drainage paths
- A ventilated cavity
- Drip edges
- Window and door flashings
- Penetration seals
- Base and parapet details
- Compatible tapes and accessories
Water that enters behind exterior cladding must have a safe path to drain out.
Ventilated facade systems
A typical ventilated fiber cement facade may include:
- Load-bearing wall
- Weather-resistant or air-control layer
- Insulation
- Brackets and subframe
- Ventilated cavity
- Fiber cement facade panel
- Open or designed panel joints
The cavity should remain continuous where required. Ventilation openings should not be blocked by insulation, sealant, debris or incorrectly positioned profiles.
Fire barriers and cavity barriers must be incorporated according to the building design and local fire requirements.
Wet-area installations
In showers, bathrooms and other wet areas, the fiber cement board may be a stable substrate rather than the final waterproof layer.
Depending on the approved system, additional components may include:
- Waterproof membranes
- Reinforcing tape
- Internal and external corner treatments
- Pipe collars
- Drain connections
- Compatible tile adhesive
- Flexible sealant at movement joints
The waterproofing strategy should be confirmed before the boards are fixed.
10. Installation by Product Type
Standard Fiber Cement Board
Standard boards may be used for walls, ceilings, soffits and construction substrates when the product specification permits.
A typical installation sequence is:
- Confirm the board is approved for the application.
- Inspect the timber or steel framing.
- Install required membranes or backing layers.
- Plan the board orientation and joint layout.
- Cut the board using an approved method.
- Treat cut edges where required.
- Position the sheet without forcing it into adjoining surfaces.
- Fix it according to the approved fastening schedule.
- Complete the joints using the specified joint system.
- Apply the approved coating, waterproofing or finish.
Explore our standard fiber cement board range.
Fiber Cement Facade Panels
Facade panels require closer coordination between the panel layout and supporting structure.
The installation process may include:
- Structural assessment of the supporting wall
- Bracket and rail layout
- Insulation and membrane installation
- Cavity and fire-barrier design
- Panel optimization and cutting
- Pre-drilling or rear machining
- Fixed-point and sliding-point identification
- Installation using facade screws, rivets, clips or concealed anchors
- Joint alignment
- Cleaning and final inspection
Wind loading must be assessed for the actual panel size, building height, fixing layout and project location.
A large panel should not simply be installed using the same fixing arrangement as a smaller panel cut from the same sheet.
Explore our fiber cement facade panels.
Fiber Cement Siding
Siding is usually installed as horizontal or vertical planks using a defined overlap, clip or open-joint arrangement.
The system may require:
- A starter profile
- Timber or metal battens
- A weather barrier
- Ventilation and drainage
- Corner profiles
- Window and door flashings
- Defined clearances
- Blind or face fixing
- A specific overlap
- Compatible touch-up or cut-edge coating
Wood grain and smooth siding may use similar supporting principles, but the profile, finish and fixing system must still be checked.
Explore our wood grain fiber cement siding and smooth fiber cement siding.
11. Installing Around Windows, Doors and Openings
Openings are common locations for cracks and water-entry problems.
Before cutting panels around an opening, check:
- Support behind panel edges
- Flashing at the window head
- Sill drainage
- Jamb treatment
- Required clearances
- Joint location
- Fastener position
- Sealant compatibility
- Panel movement
Avoid creating narrow, unsupported strips or highly stressed internal corners.
For many large-format facade systems, dividing the area around a window into separate rectangular panels is safer than creating one large panel with a complex L-shaped or U-shaped cut-out.
Any cut-out must still have adequate support and fixing positions.
12. Ten Common Fiber Cement Board Installation Mistakes
1. Selecting the board only by thickness
Thickness does not confirm exterior durability, strength class, finish suitability or structural capacity.
2. Installing over uneven framing
Uneven supports can produce stepped joints, visible distortion and concentrated stress.
3. Using unapproved fasteners
Incorrect screws or nails may corrode, pull through the board or damage the surface.
4. Fixing too close to an edge or corner
Insufficient edge distance increases the risk of cracking.
5. Overdriving screws
Overdriven fasteners can crush the board surface and reduce the reliability of the fixing.
6. Installing boards tightly without movement allowance
Boards or subframes that cannot move as designed may crack or buckle.
7. Ignoring cut-edge treatment
Unprotected cut edges can behave differently from factory-finished surfaces.
8. Treating the board as the complete waterproofing system
Exterior and wet-area systems normally require additional moisture-management components.
9. Blocking the ventilation cavity
A blocked cavity cannot provide the intended drainage and drying.
10. Copying another manufacturer’s installation parameters
Similar-looking fiber cement products may have different densities, strengths, hole sizes, fasteners and fixing limits.
13. Pre-Installation Checklist
Before work begins, confirm the following.
Product
- Correct product type
- Correct thickness and dimensions
- Correct finish and edge profile
- Suitable exposure classification
- Current technical documentation
Structure
- Straight and stable framing
- Confirmed support spacing
- Adequate fixing capacity
- Required support around openings
- Approved wind-load design where applicable
Accessories
- Correct screws, nails, rivets or clips
- Compatible joint materials
- Required membranes and flashing
- Edge sealer or touch-up coating
- Appropriate trims and profiles
Site conditions
- Boards stored flat and dry
- Safe lifting method available
- Controlled cutting area prepared
- Dust extraction and PPE available
- Finished surfaces protected
- Installation sequence agreed
Quality control
- Fastener layout marked
- Board orientation confirmed
- Joint widths checked
- Openings properly supported
- Ventilation paths kept clear
- Damaged boards removed or assessed
Frequently Asked Questions
Can fiber cement board be installed outdoors?
Yes, but only when the exact product is suitable for the intended exterior exposure.
A standard interior board should not automatically be used as exterior sheathing or exposed cladding. Confirm weathering classification, freeze-thaw performance where relevant, heat-rain performance, surface treatment and installation requirements.
Is fiber cement board waterproof?
Fiber cement products are generally selected for good moisture resistance, but “moisture-resistant” and “waterproof” are not the same.
An exterior wall or wet-area installation may still require a membrane, flashing, drainage layer or waterproof coating.
What screws should be used for fiber cement board?
Use screws approved for the specific board and supporting structure.
Selection depends on whether the framing is timber or steel, whether the application is interior or exterior, the board thickness and the required corrosion resistance.
Can drywall screws be used?
They should not be assumed suitable.
Ordinary drywall screws may not provide the required head design, corrosion protection, thread or load performance for a fiber cement application.
What is the correct screw spacing?
There is no universal screw spacing.
Use the fixing schedule supplied for the exact product and application. Exterior wind loads, board dimensions, framing spacing and fastener capacity can significantly change the required layout.
Should there be a gap between fiber cement boards?
Many systems require a defined joint or gap, but the correct width and treatment depend on the product.
The joint may be open, sealed, taped, expressed or covered by a profile. Follow the approved system rather than forcing every board tightly together.
Does fiber cement board need a weather barrier?
Many exterior wall and siding systems require a water-resistive or weather-resistant layer behind the board.
The board is one component of the building envelope and should not automatically be treated as the only protection against water intrusion.
Can fiber cement board be installed directly over timber or steel studs?
Some products can be fixed directly to studs, while others require battens, continuous backing, a subframe or additional layers.
Confirm the approved installation system and maximum support spacing.
Is pre-drilling required?
It depends on the board, fastener and application.
High-density facade panels commonly require accurately positioned pre-drilled holes. Some standard construction boards can accept approved self-drilling screws without pre-drilling.
Can fiber cement board be used as structural sheathing or flooring?
Only when the exact product has been designed, tested and documented for that structural use.
A thick board is not automatically a structural board.
Final Thoughts
A successful fiber cement board installation begins before the first fastener is driven.
The installer must understand:
- Which type of board is being used
- What function it performs
- How it is supported
- How it is allowed to move
- How water is drained
- How the joints are treated
- How the fasteners interact with the board and framing
The objective is not simply to attach the sheet securely. It is to create a complete wall, ceiling, soffit, siding or facade system that remains stable throughout its intended service life.
Need Help Planning a Fiber Cement Board Project?
Tell us:
- The intended application
- Required board dimensions
- Preferred thickness
- Framing or subframe type
- Surface finish
- Project climate
- Required standards
- Order quantity
- Destination market
The Dartex team can help you compare standard fiber cement boards, facade panels and siding products before quotation.
WhatsApp: +86 136 0660 2457
Email: vicky@dartnewboard.com
From material knowledge to project support
Technical Library
More Knowledge
Practical guidance for selecting, specifying and installing fiber cement boards across different building applications.
Installation Ecosystem
ConstructMat Solutions
Complete the board system with compatible fixing, joint-treatment and waterproofing accessories selected for reliable installation.
- Board Fixing
- Joint Treatment
- Waterproofing
- Basic Tools
Project Enquiry
Need help choosing the right fiber cement board?
Tell us about the application, board thickness, finishing requirement and project location. Our team will help you review a practical product option.